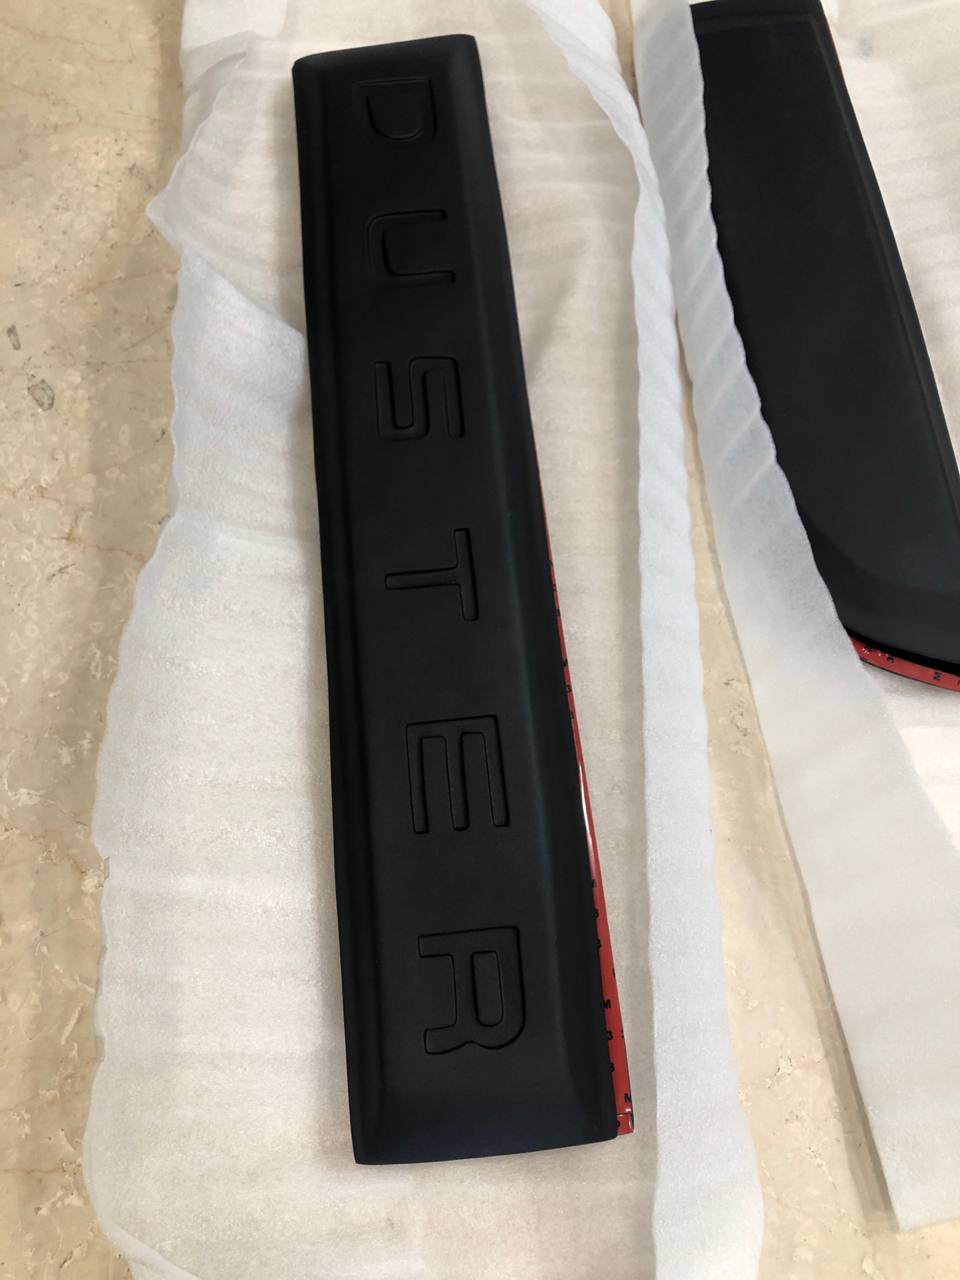
Description
- Compatible with Duster
- Body Side Beadings pair for protection from scratches and dents
- Chrome Door Side Cladding for a luxurious look
- Available in silver and Black colour
- Aesthetic add–on featuring lines on the body panel giving it a sporty look
- Made up of anti-corrosion and rust-free materials for Durability
- The easy installation process with no drilling and no modifications
- Use of ABS plastic materials to ensure strength
- To be placed on the Door or below the door.
- Pack of 4 with Adhesive tape
- Side Beadings
Side Beading For Duster
Duster Side Beading is a language to represent your car with style and protect it from the harshness of the environment. The side beading is the best accessory with multiple benefits in optimum investment.
What is in the package by Drivestylish?
- A side beading pair is suitable for Duster. (Left and right)
- Cleaner to clean the surface
- Adhesive tape
- Installation Manual
Perks of installing Tigor side beading
Protection of the car body: Guards against dents and scratches caused by accidental bumps and minor impacts.
- Aesthetic Enhancement: Adds a stylish visual division to the body of Duster.
- Weather Resistance: Resilient to varying weather conditions such as rain, sunlight, and road debris.
- Easy Installation: Simple to install with adhesive backing or clips, requiring minimal tools and time.
- Longevity: Durable materials ensure prolonged protection and aesthetic appeal.
- Maintenance: Easy to clean and maintain, enhancing convenience for car owners.
- Resale Value: Helps maintain the vehicle's resale value by preserving the exterior condition.
- Cost-Effective: Prevents potential repair costs from minor damages, offering value in the long run.
🟢Side Beading Price List
|
Rs. 2,199.00 |
|
|
Rs. 2,499.00 |
|
|
Rs. 1,999.00 |
The process to Install Tiago Side beading:
Step 1: Preparing the car for installation: The car side beading should be installed on a clean surface. Clean the vehicle’s exterior surface so that it can stick properly. Wash or wipe with a mild detergent and water to remove any dirt, grease, or wax residue.
Step 2: Placement and Alignment: Precisely measure and indicate where the side beading should be placed on the car's body panels with either masking tape or chalk.
Step 3: Application of Adhesive: Use an applicator or adhesive tape to apply a thin, even coat of automotive-grade adhesive to the back of the side beading.
Step 4: Applying Pressure and Ensuring Stability: After applying the adhesive, firmly press the side beading onto the surface of the vehicle, beginning from one end and moving towards the other for security.
***Allow enough time for the adhesive to properly cure and bond to the vehicle's surface after installing the side beading.
What Our Customers Say


I recently purchased car accessories online from Drivestylish and was very impressed with the experience. Their prices were much better compared to other stores in the market, and all the items were genuine OEM products of excellent quality. The team guided me throughout the purchase process, helping me choose the right specifications for each item. Before shipping, they even sent a video demonstration showing the electrical parts being tested for proper functionality. Hardik ensured the packaging and shipping were handled with great care — everything arrived safely and without any damage. After purchase, I had a few questions about installation, and Hardik provided helpful guidance along with sample fitting videos. I’m extremely satisfied with the service and would definitely make future purchases from Drivestylish.

I bought electric side steps for my XUV700 and had a great experience. The service was excellent, staff were helpful. Very happy with the quality of the side steps and the service provided. Highly recommended 👍👍👍

I’m from Mumbai and I have been following them for quite a while, recently I got a Ford Endeavour and I wanted to make few changes so I checked online for Android Auto , Rear Guard, Rear Fog lights and they gave me the best price, I was sure to go with them so I ordered all the things from them, at first I was sceptical to make full payment but because I follow them I know they are the best in this after payment I got the package in 4 days and these guys were way above my expectation because the packaging was amazing and the quality of products were top notch overall I was getting great support from them amazing person from start to finish he solved all my queries infact after receiving the product he was there to guide my installation guy overall it was a great experience and I would highly recommend everyone to trust these guys blindly because they are doing an amazing job, Thanks to DriveStylish for giving me a first class service Highly recommended ❤️

I purchased an automatic footstep for Xuv 700 and install locally,but they help me on video call for installation the product specially electric connection.and finally successfully installed the product.they are very help full.thanks to all

Best place to visit

Very nice work done, very much happy with seat covers and ppf quality

Quality products and fast delivery,very responseble team

Very good experience. Got ppf done. Reasonable price.


