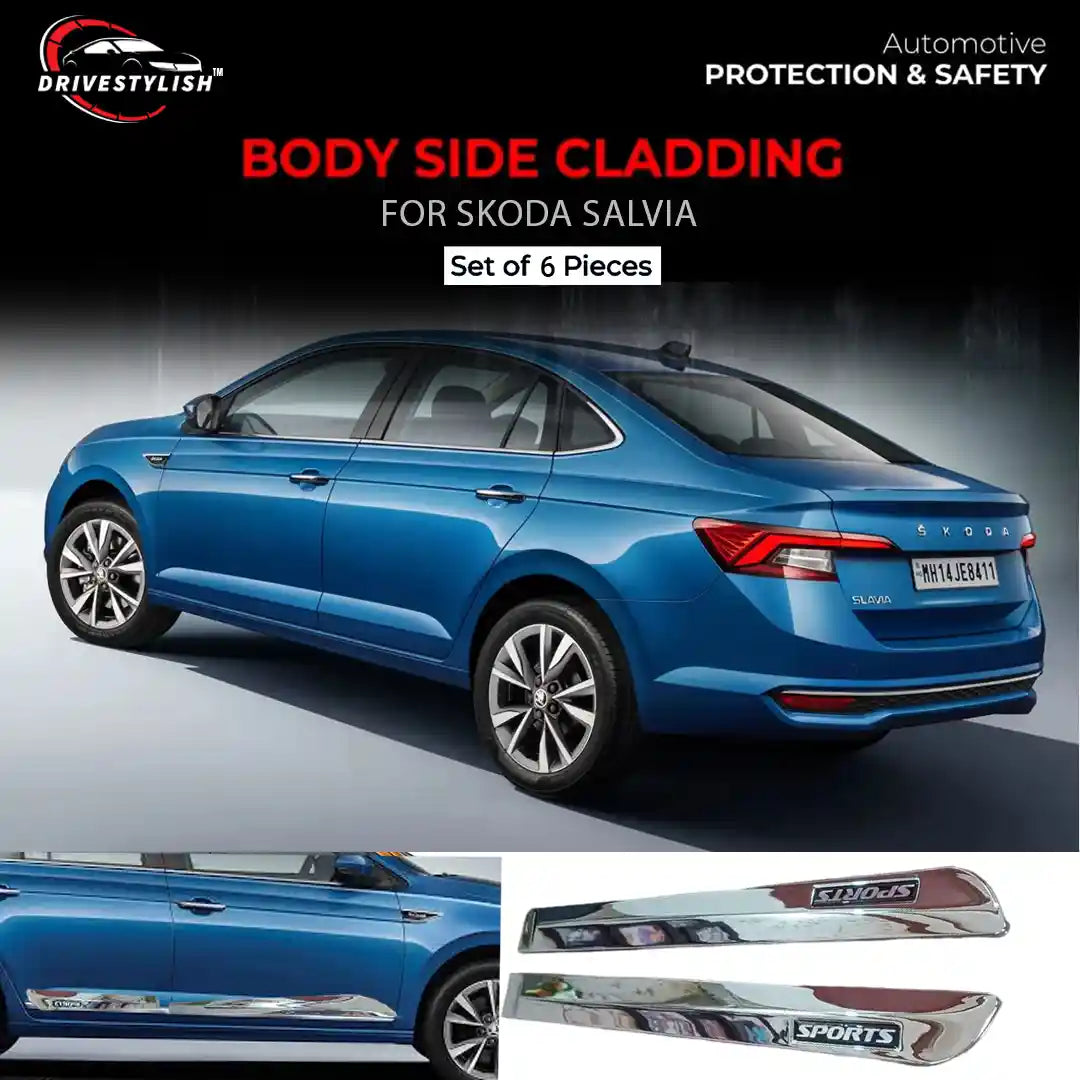
Description
- Compatible for Slavia
- Body Side Beadings pair for protection from scratches and dents
- Chrome Door Side Cladding for a luxurious look
- Available in silver and Black colour
- Aesthetic add–on featuring lines on the body panel giving it a sporty look
- Made up of anti-corrosion and rust-free materials for Durability
- The easy installation process with no drilling and no modifications
- Use of ABS plastic materials to ensure strength
- To be placed on the Door or below the door.
- Pack of 4 with Adhesive tap
- Side Beadings
Side Beading Chrome Salvia
The Slavia side beading aren't just accents; they're your car's armour against the unexpected. Designed to deflect dings and scratches while amplifying its aesthetic appeal, these sleek additions blend seamlessly with your Slavia's contours.
What is in the package by Drivestylish?
- A side beading pair is suitable for Slavia. (Left and right)
- Cleaner to clean the surface
- Adhesive tape
- Installation Manual
Advantages of installing Slavia side beading
Unmatched durability: Side beading for Slavia are made up of strong ABS plastic that ensures strength and unmatched durability.
Car body protection under Budget: These exterior accessories prevent the body from dents and scratches during traffic by other vehicles or mishaps in parking areas.
Elevates the looks of the car: The side beading add a sporty upgrade to the car. The lines on the car body can be identified from far.
Environmental Flexible: Can withstand a variety of weather conditions, including rain, sunshine, and road debris.
Placement is simple, using the sticky tape included in the package. It just takes 24 hours for the powerful adhesive to bond to the automobile.
Maintenance: Simple to clean and maintain. To clean the surface of the side beading, simply use detergent and water.
🟢Side Beading Price List
|
Rs. 1,749.00 |
|
|
Rs. 1,099.00 |
|
|
Rs. 2,349.00 |
The process to Install Slavia Side beading:
Step 1: Setting up the car for installation: The car's side beading should be applied on a clean surface. Clean the vehicle's external surface so that it will adhere correctly. Use a moderate detergent and water to remove any dirt, dirt, or wax buildup.
Step 2: Position and Alignment: Use the tape included in the package to precisely measure and mark where the side beading should be put on the car's body panels.
Step 3: Apply the Adhesive: Use the adhesive tape to apply a thin, uniform layer of automotive-grade glue on the rear of the side beading.
Step 4: Applying Pressure and Maintaining Stability after using the adhesive, firmly press the side beads onto the vehicle's surface. Leave the beading for a while to set up.
drivestylish.com‘s straightforward ordering system allows you to create an account and place your order easily, eliminating the need to search for the perfect Side beadings in traditional stores.
What Our Customers Say


I recently purchased car accessories online from Drivestylish and was very impressed with the experience. Their prices were much better compared to other stores in the market, and all the items were genuine OEM products of excellent quality. The team guided me throughout the purchase process, helping me choose the right specifications for each item. Before shipping, they even sent a video demonstration showing the electrical parts being tested for proper functionality. Hardik ensured the packaging and shipping were handled with great care — everything arrived safely and without any damage. After purchase, I had a few questions about installation, and Hardik provided helpful guidance along with sample fitting videos. I’m extremely satisfied with the service and would definitely make future purchases from Drivestylish.

I bought electric side steps for my XUV700 and had a great experience. The service was excellent, staff were helpful. Very happy with the quality of the side steps and the service provided. Highly recommended 👍👍👍

I’m from Mumbai and I have been following them for quite a while, recently I got a Ford Endeavour and I wanted to make few changes so I checked online for Android Auto , Rear Guard, Rear Fog lights and they gave me the best price, I was sure to go with them so I ordered all the things from them, at first I was sceptical to make full payment but because I follow them I know they are the best in this after payment I got the package in 4 days and these guys were way above my expectation because the packaging was amazing and the quality of products were top notch overall I was getting great support from them amazing person from start to finish he solved all my queries infact after receiving the product he was there to guide my installation guy overall it was a great experience and I would highly recommend everyone to trust these guys blindly because they are doing an amazing job, Thanks to DriveStylish for giving me a first class service Highly recommended ❤️

I purchased an automatic footstep for Xuv 700 and install locally,but they help me on video call for installation the product specially electric connection.and finally successfully installed the product.they are very help full.thanks to all

Best place to visit

Very nice work done, very much happy with seat covers and ppf quality

Quality products and fast delivery,very responseble team

Very good experience. Got ppf done. Reasonable price.

